
Leather Tote Making at Brooklyn Craft Company
Last month, I attended a leather tote making workshop at Brooklyn Craft Company, an adorable studio offering a variety of modern craft + DIY classes including skirt making and glass etching. When I discovered that they were offering a leather tote making class I, of course, had to sign up. I am not the best sewer and never tried sewing leather before so thought that this would be the perfect opportunity to.


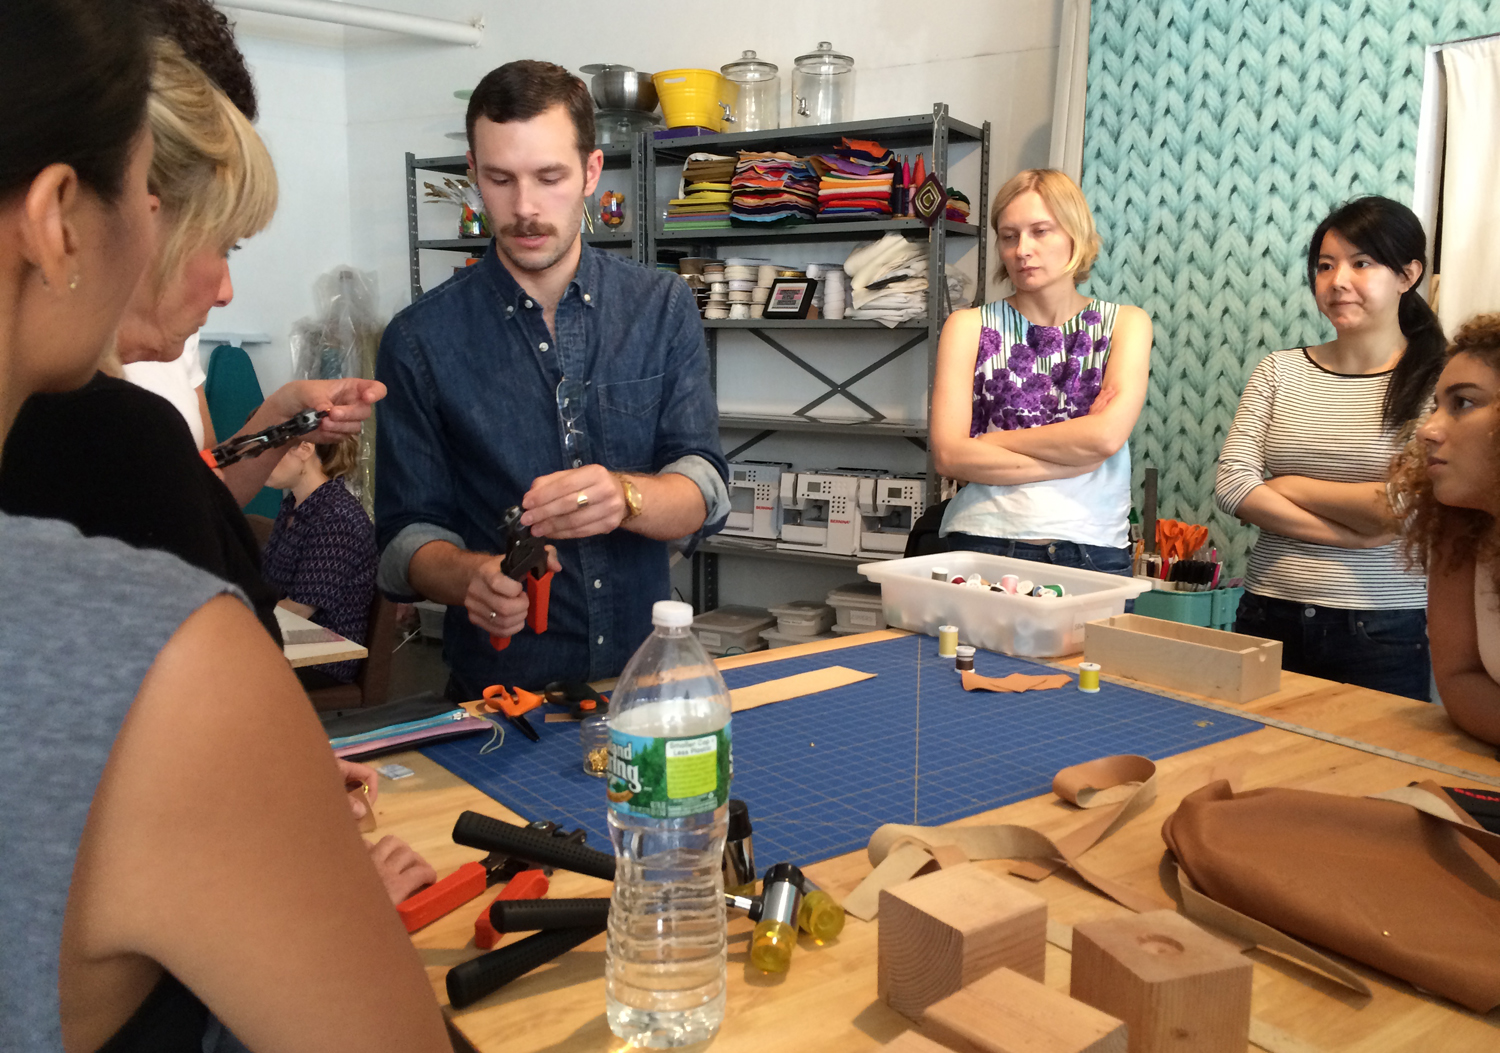
Joey Casey, our super fun and talented teacher, began by going over what to expect from the workshop, running through sewing machine basics and the different materials we would be working with.

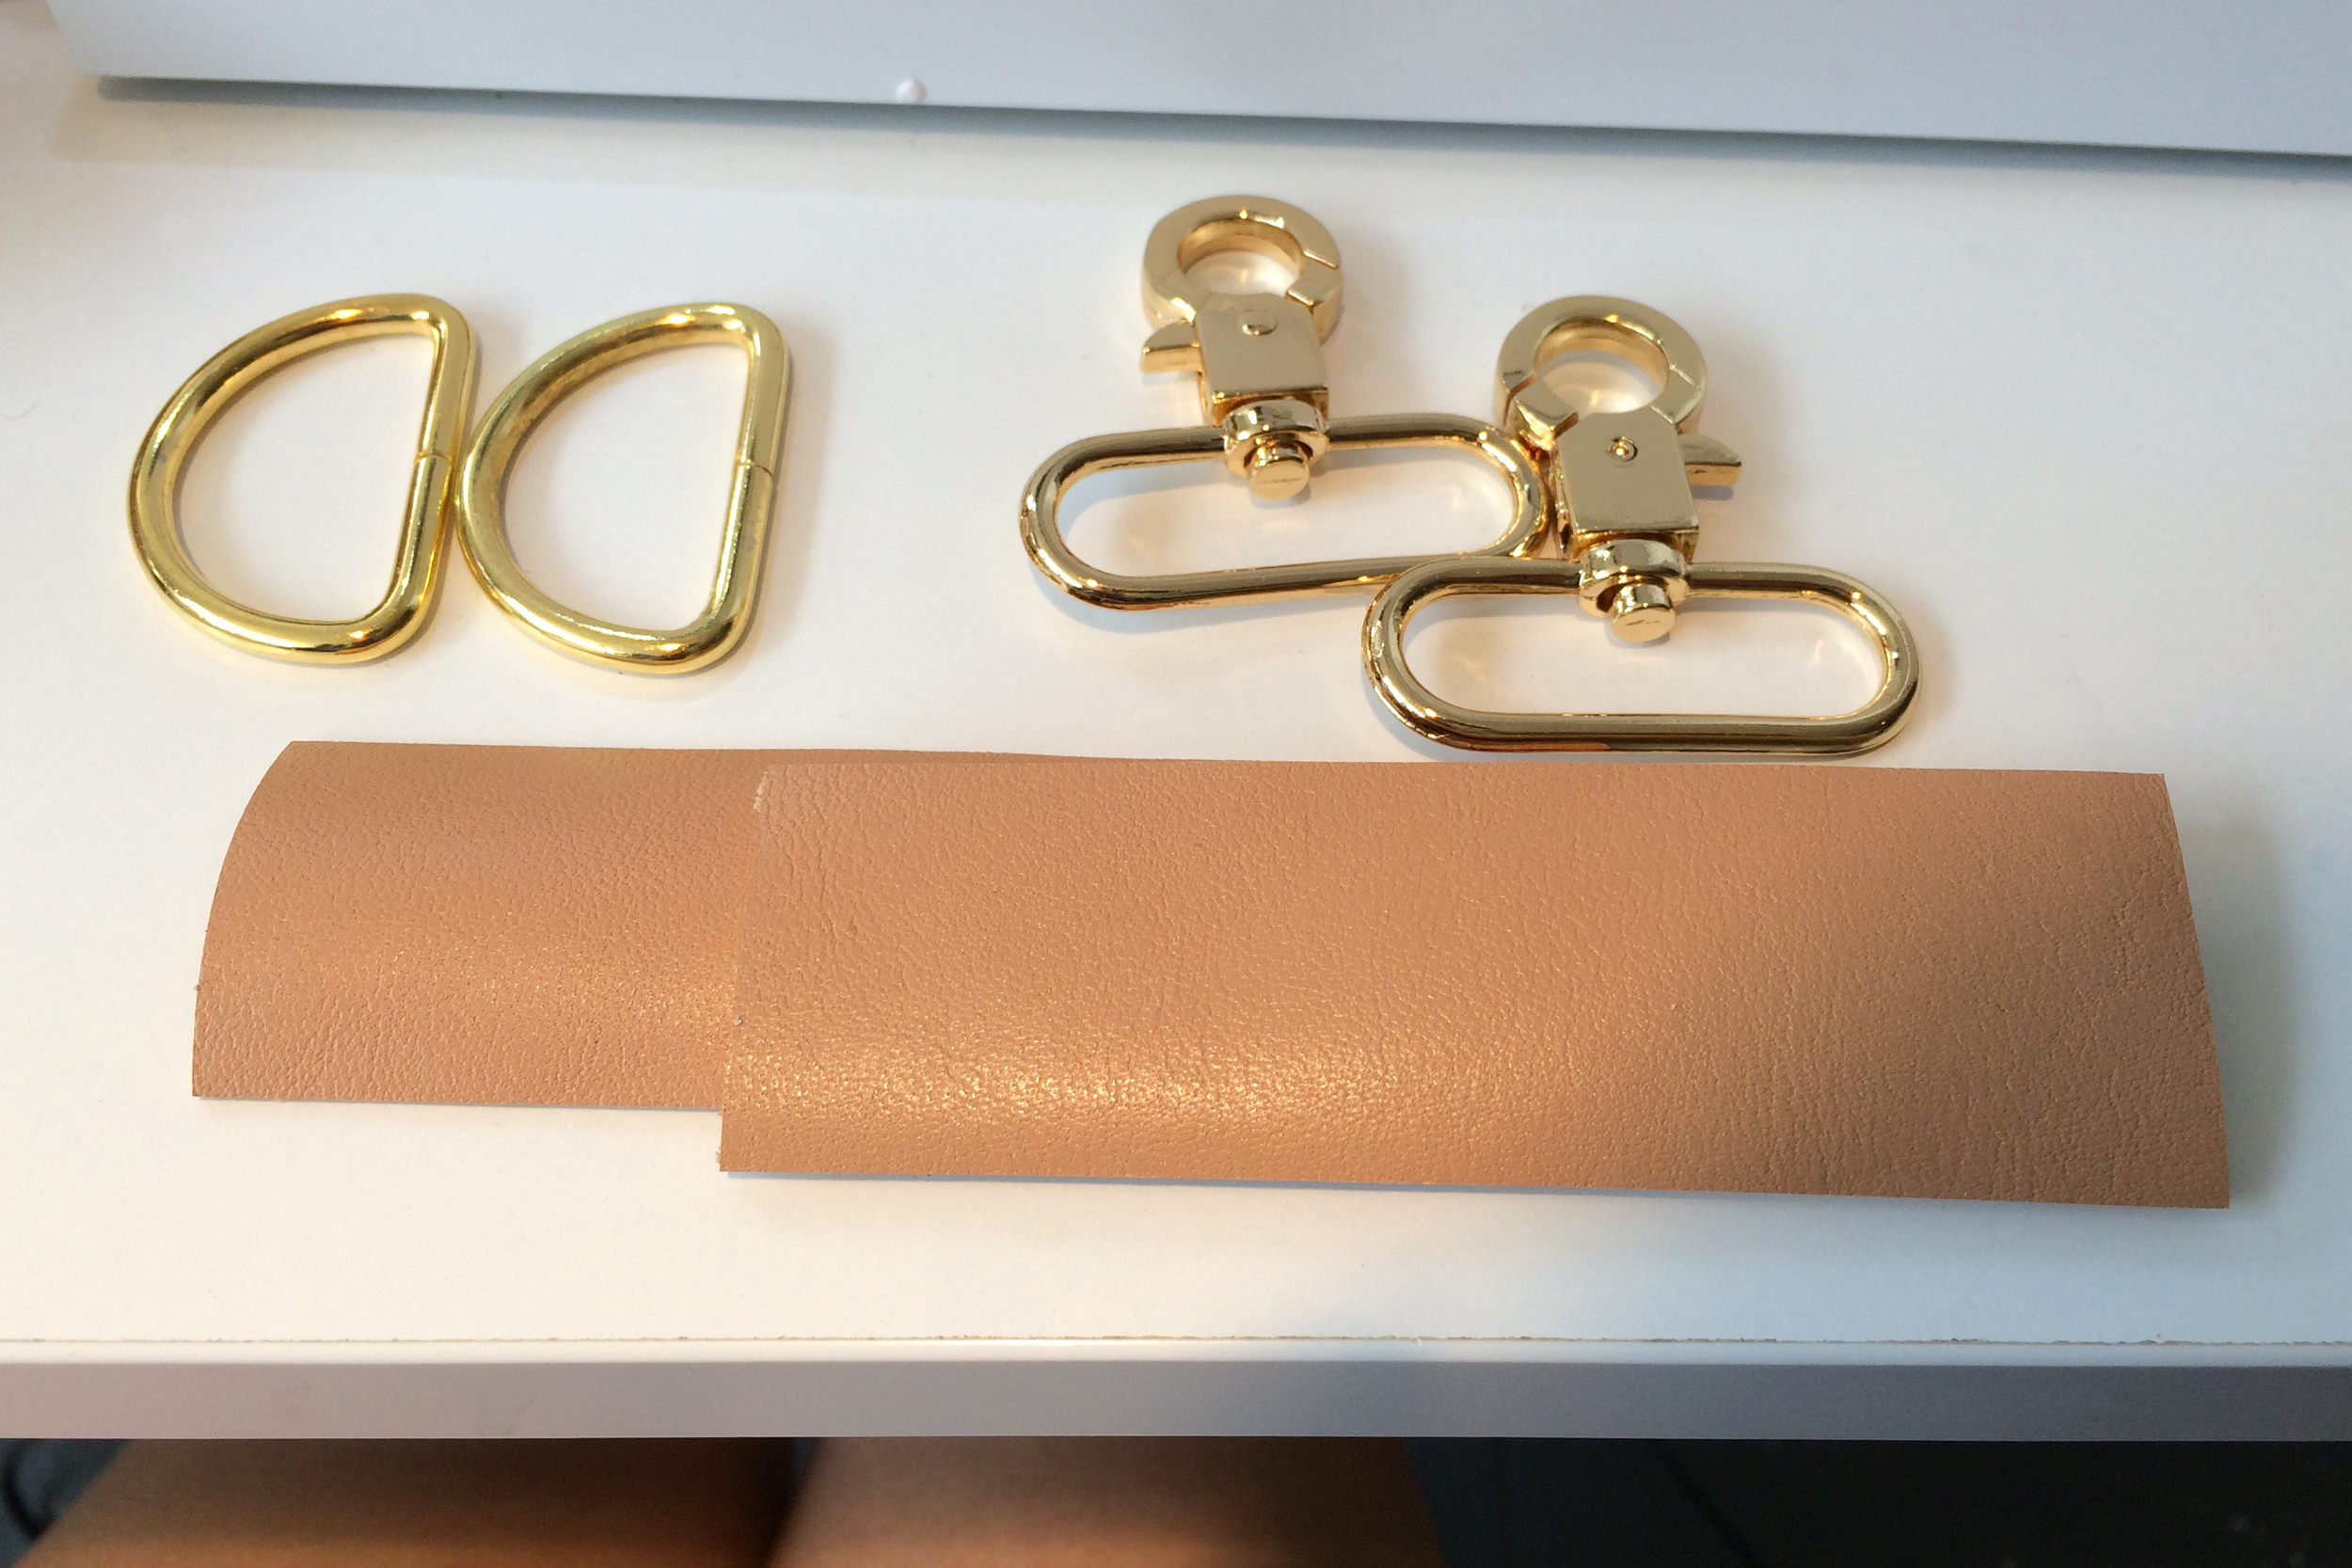
Our cow leather pieces nicely pre-cut for us. I am obsessed with this warm nude color!

I would have to admit that sewing leather for the first time was quite nerve-wrecking. Unlike sewing fabric, which is very forgiving, if you decide to remove the stitches on leather, you would be left with very ugly needle-punctured marks. In other words, you only have one chance to get it right.
We practiced sewing on leather scrapes to make sure we got a good feel for our sewing machines. Joey continuously reminded us that our stitches don't and will not be perfect and that is perfectly alright. "People will come up to you and compliment how cute your bag looks, NOT how uneven your stitches are."

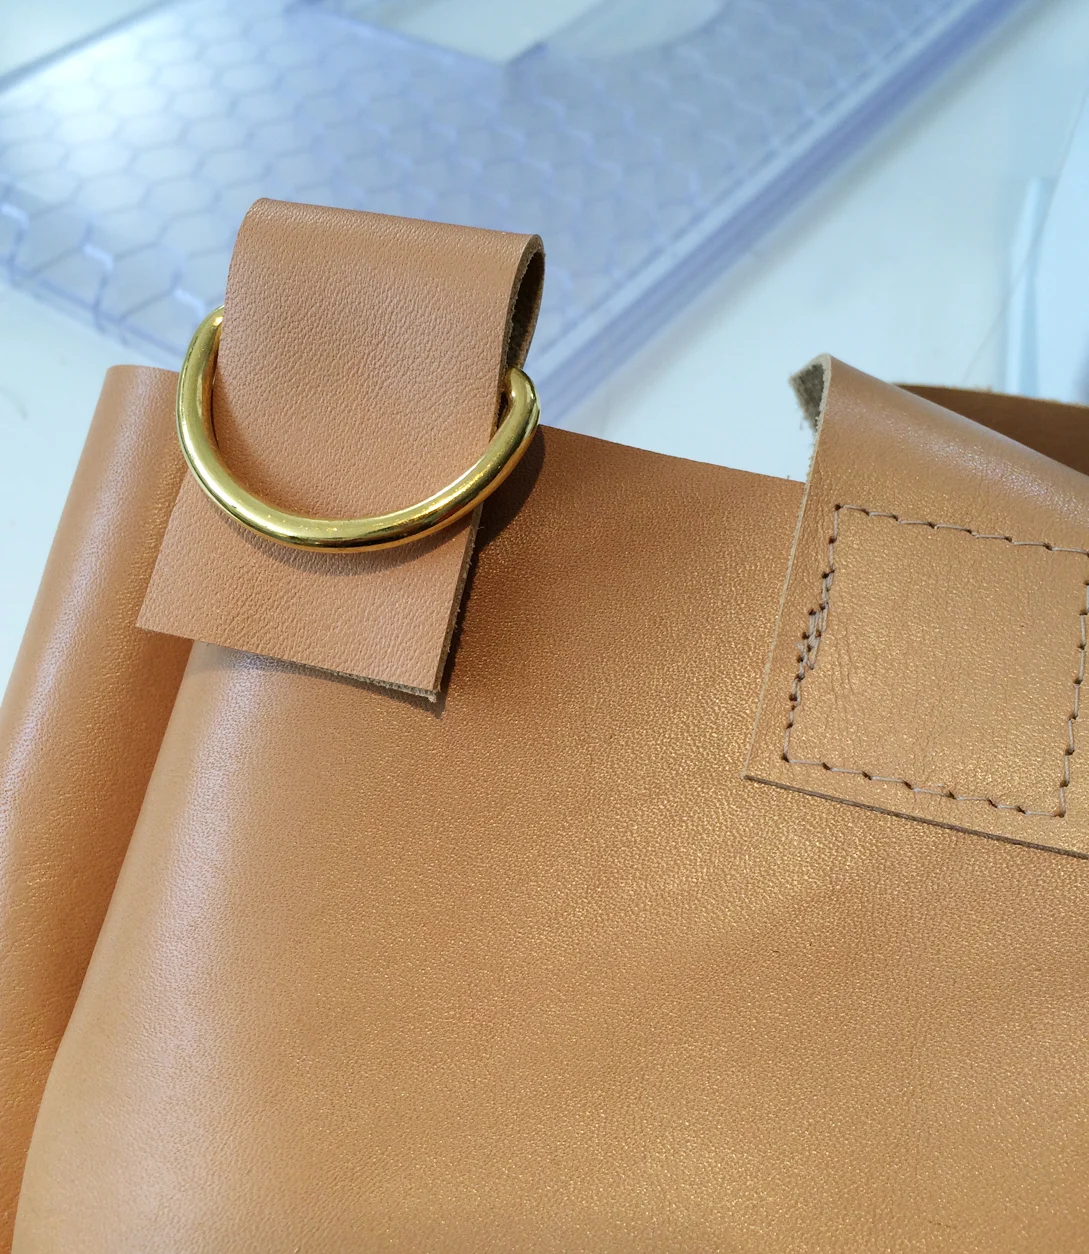
We had the option of sewing a pocket on the inside or outside of the tote. I decided that my pocket would live inside where it would hold my phone and keys safely away from potential pickpocketers.


After sewing the sides of the tote came the tricky part of closely the bottom two corners. We had to massage the leather to lie flat then sewed the corners securely closed.

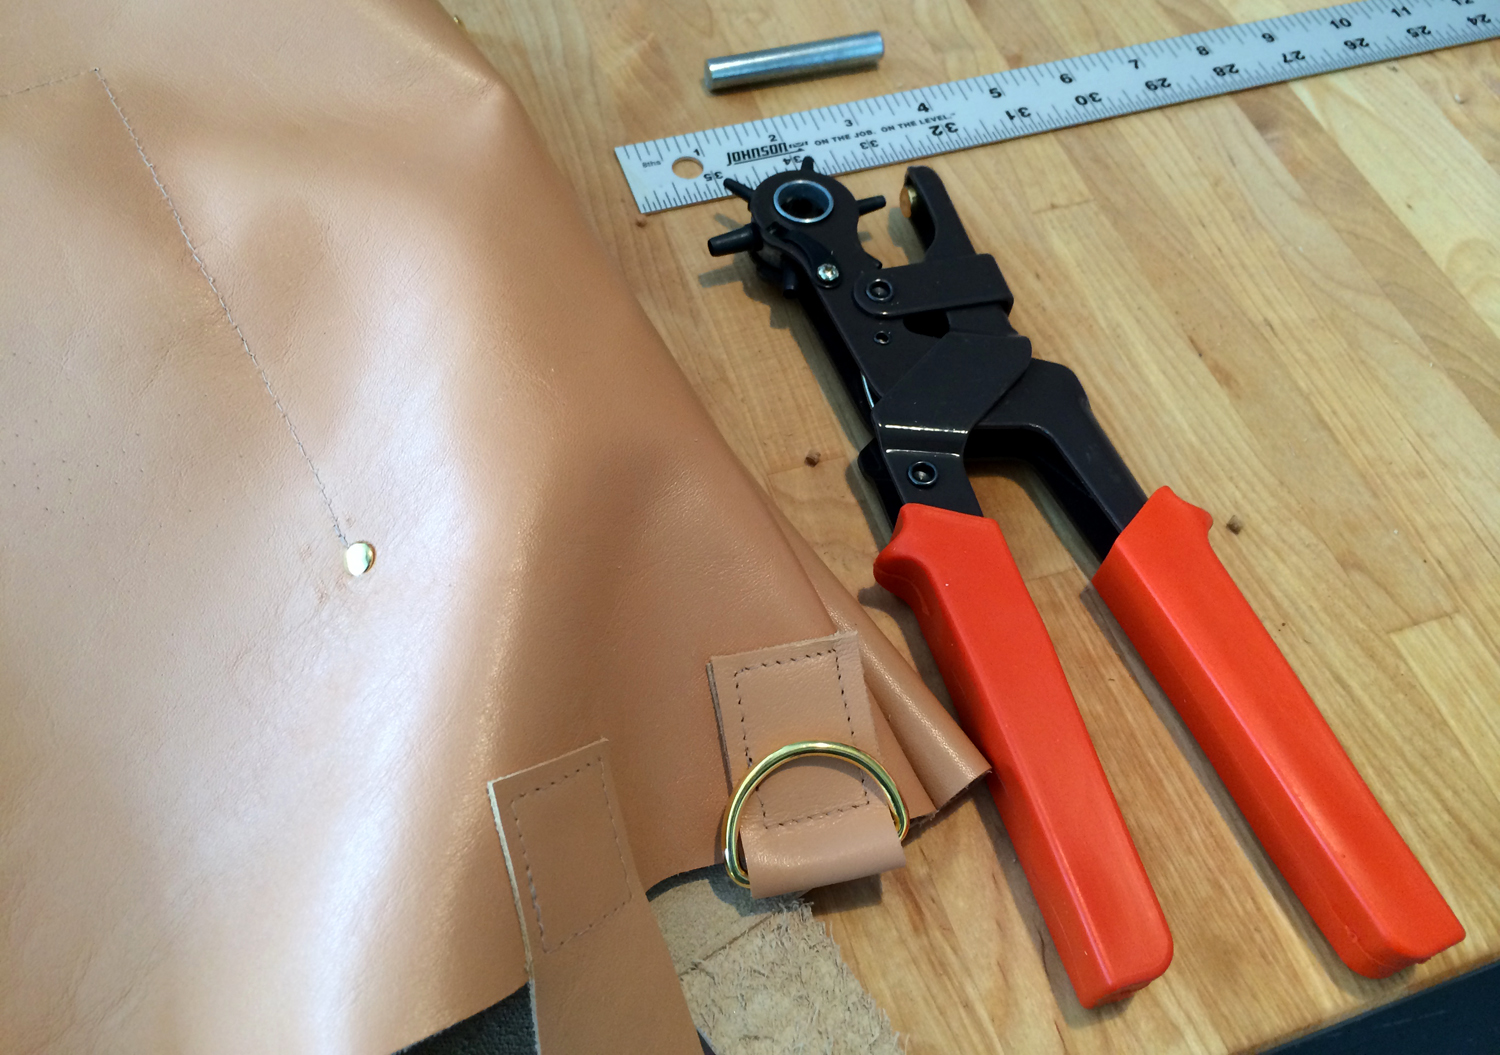
Next, adding the hardware. I am a lover of gold (sorry silver), so was really thrilled to add these sweet gold d-rings and swivel clips to the bag for the straps.

Joey showing us how to add rivets using a rivet clamping plier to puncture holes in the leather and using a mallet to secure the rivets in place. I need to get both of these nifty tools!
The completed tote! I love everything about it - the color, the perfect size to hold everything without being too big, the messenger bag style straps and the simple fact that I made. Success! Though I will say do not use on a rainy day. I guess because the leather is not treated, it will discolor when wet. I learned the hard way. But I will DEFINITELY come back to the Brooklyn Craft Company for another one of their other classes in the near future.
