
DIY Pressed Flower Phone Case
My mom is as old school as it gets when it comes to technology, but a few weeks ago she finally upgraded to her first ever smart phone. To mark this momentous occasion, I wanted to make her a customized phone case and thought a pressed flower one would be perfect. I first saw these cases on the Etsy blog and thought they were absolutely charming. And there are so many variations!

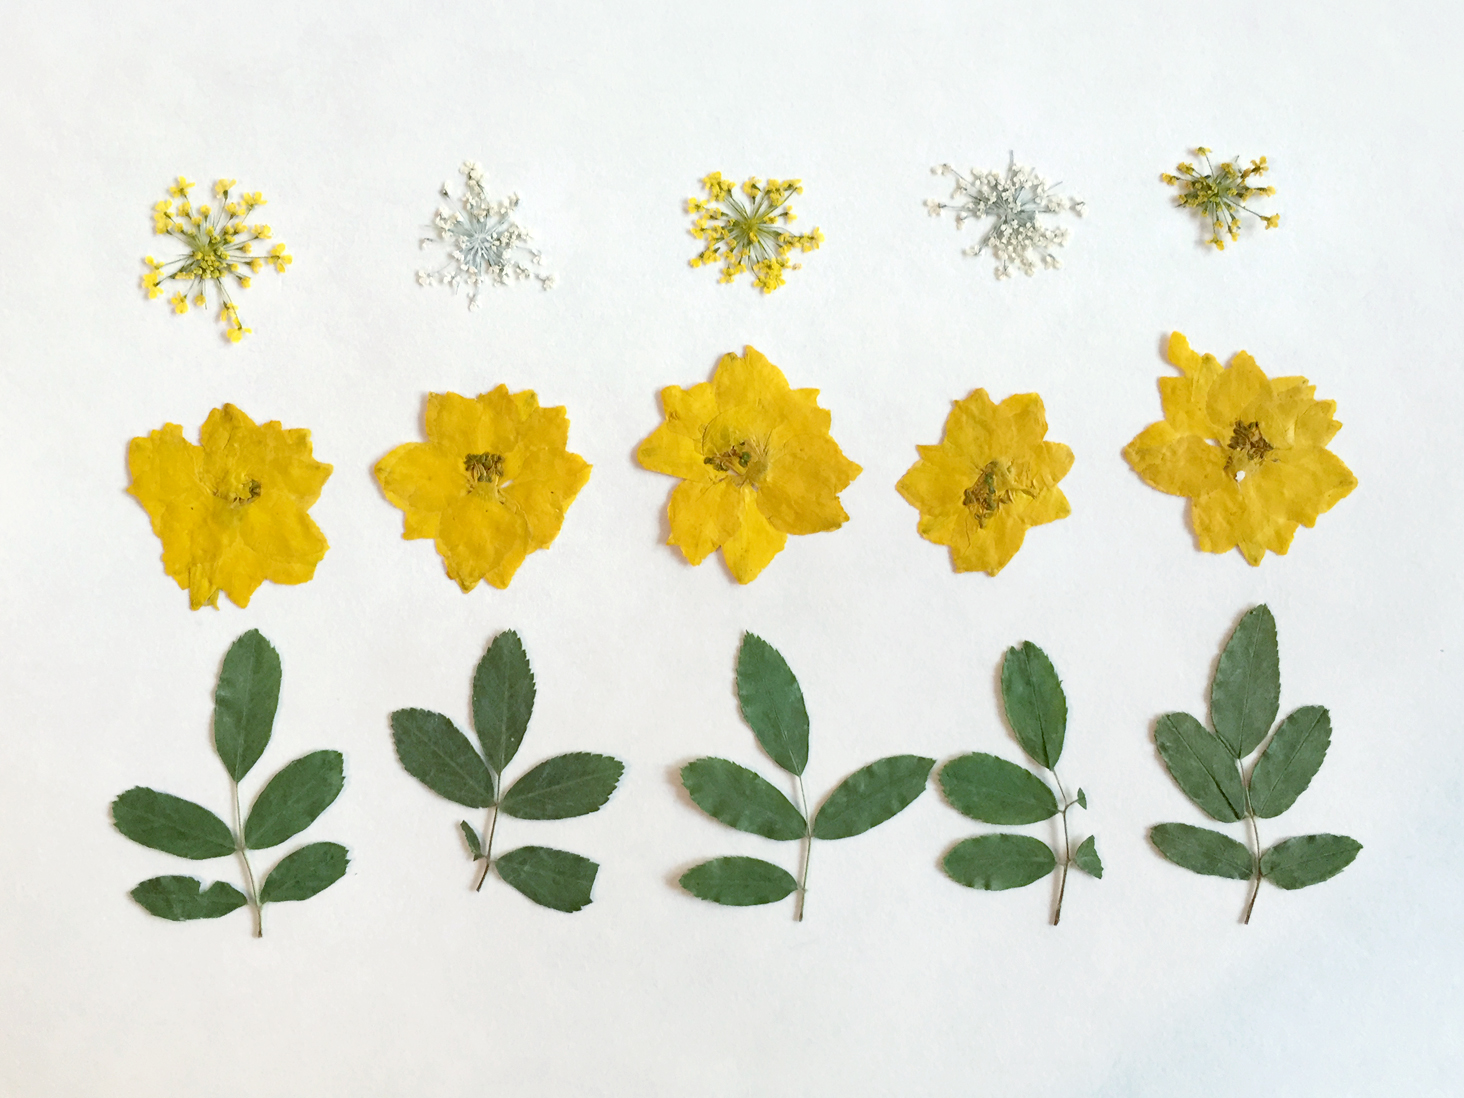
My mom loves flowers of all kinds, from lush purple orchids to blushing pink roses. She especially loves yellow flowers so I decided on with these beautiful sunshine-happy larkspurs and Queen Anne's laces from Nature's Pressed Flowers. I also got a few rose leaves to add a little bit of green.
Aren't they pretty!?

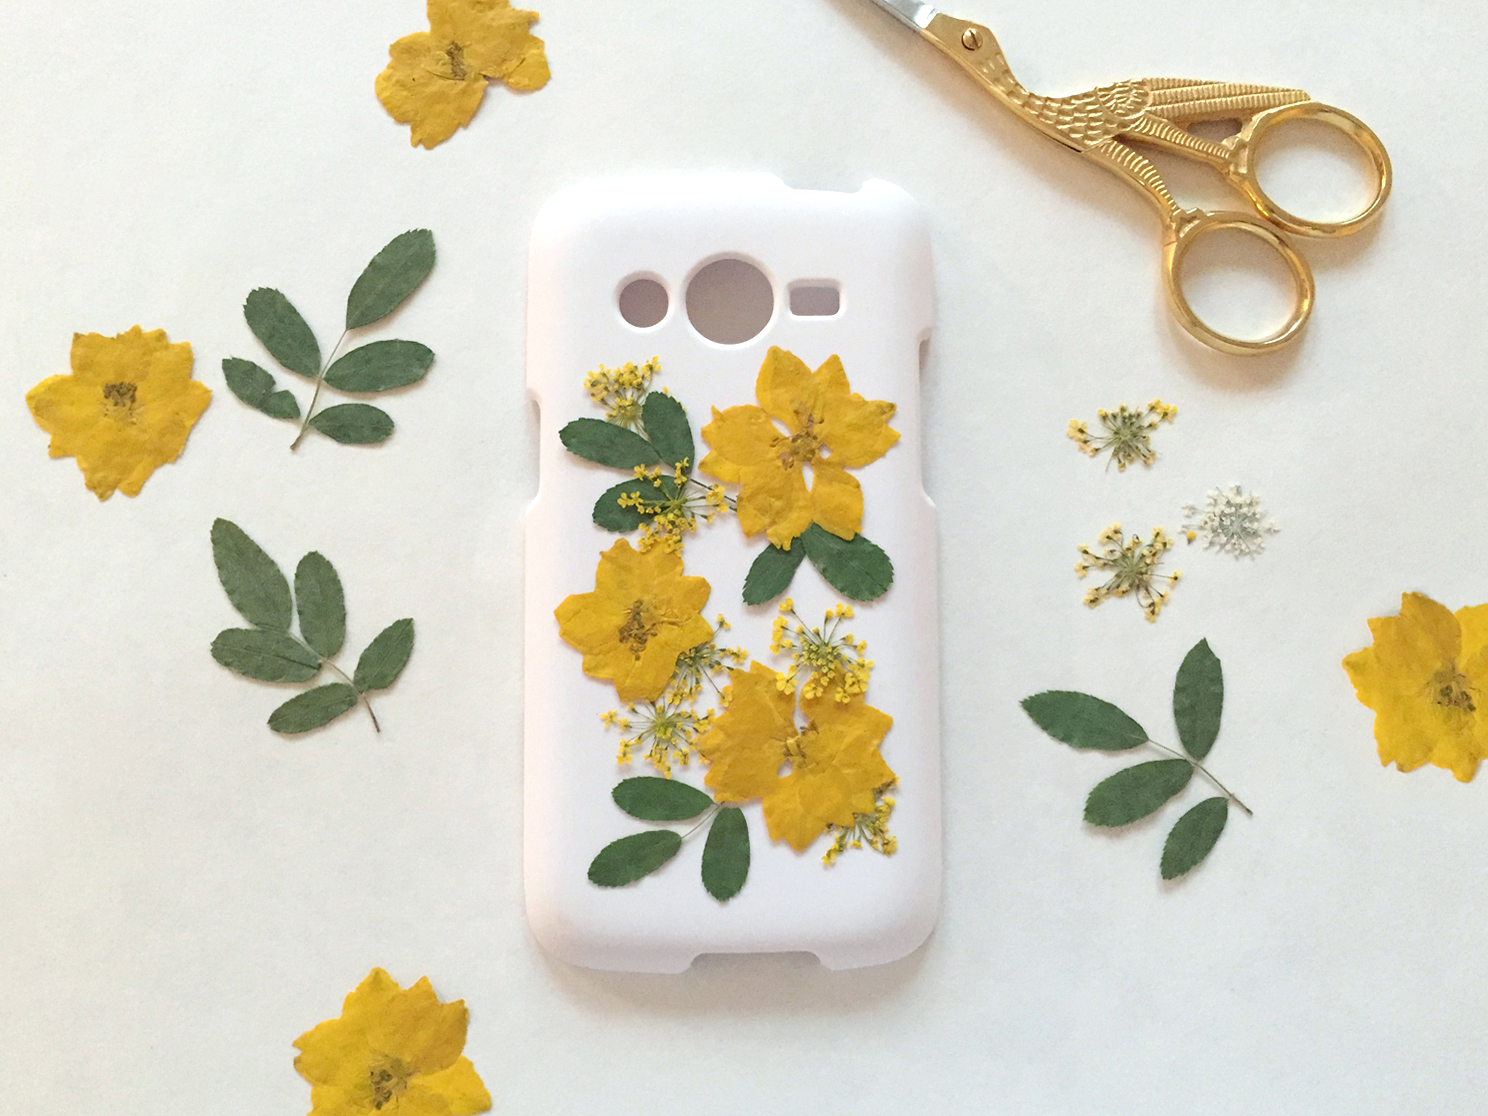
First, I arranged the flowers and leaves onto a plain white phone case. They were very delicate so handle your flowers gently, ideally with tweezers.

Once you are satisfied with your arrangement, take a picture of it so that you can remember what it looks like when you are gluing everything in place.
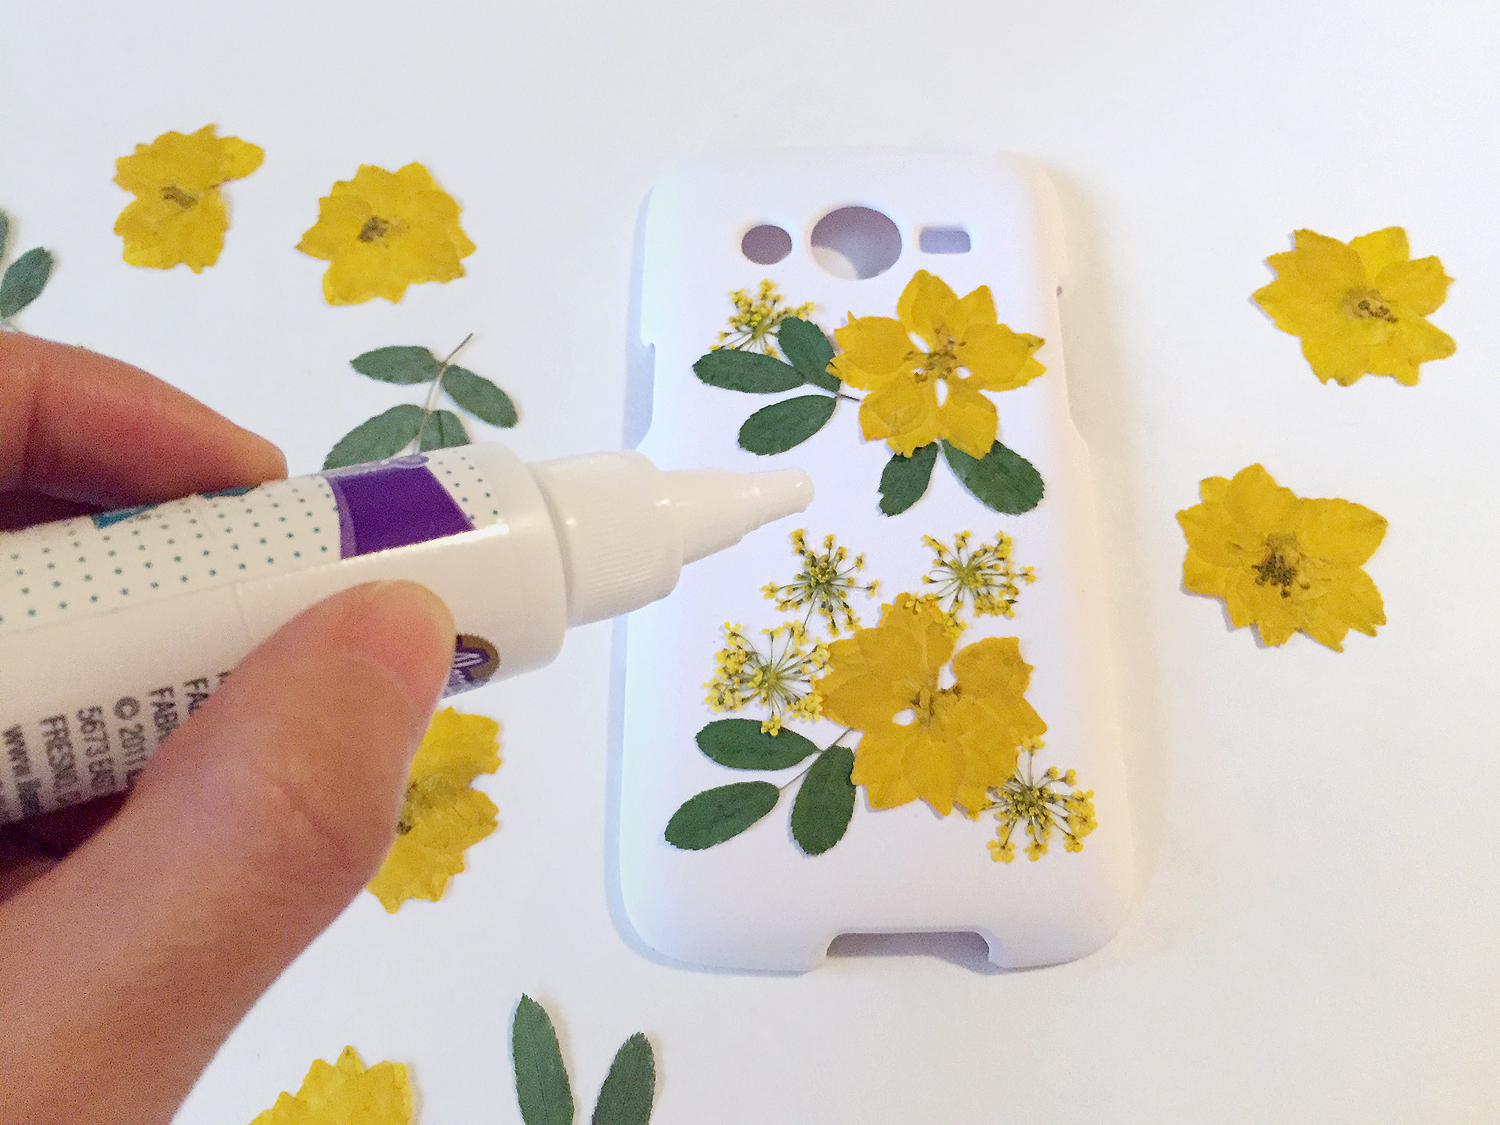
Remove all the foliage from the phone case and start gluing each piece down, using your picture as a guide. I did not have craft glue that the Etsy blog suggested and used fabric glue that I had instead. A rebel, I know! I would suggest sticking with craft glue as you will see why later.
Now for the resin! I have never used casting epoxy before so I was quite excited but scared to try. Glue is the most adventurous thing I use when it comes to 'chemicals' so you can understand why. I used the same Easy Cast as the Etsy blog and followed their directions exactly. It is best if the hardener and resin bottles are slightly warm to the touch. If they are cold, put the bottles in a bowl of warm (not hot) water while you prepare your cups.

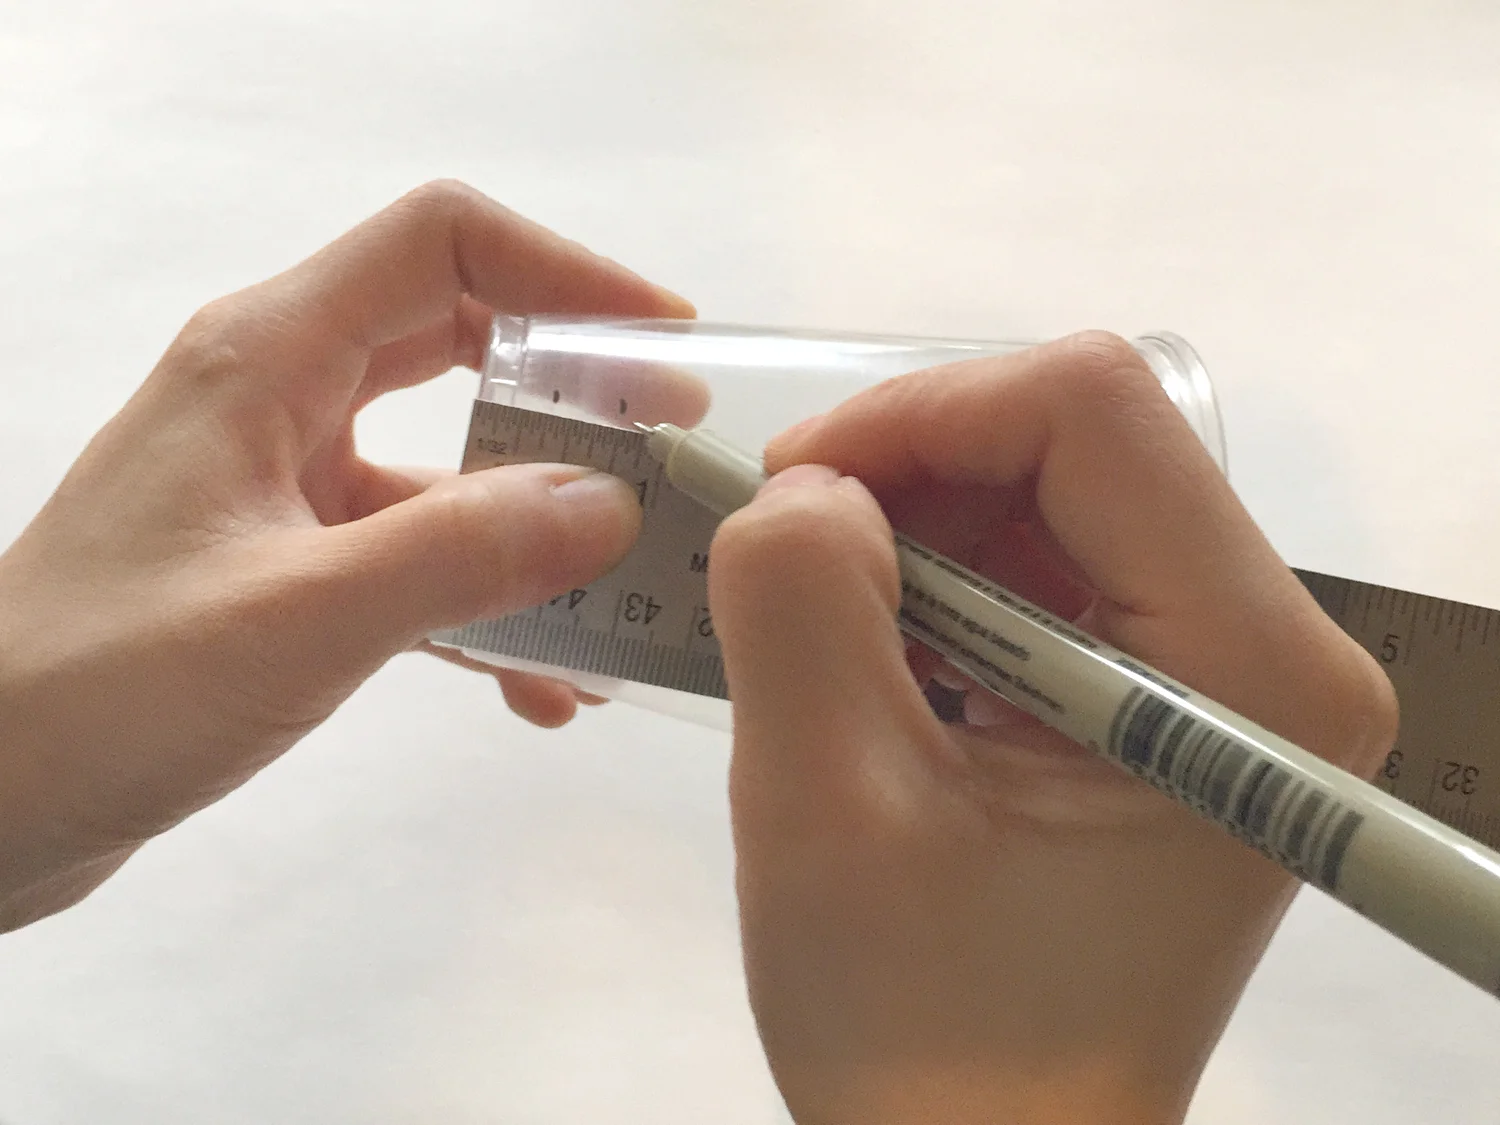
Make sure your working surface is covered. First, take a plastic cup and measure the 3/8 inch and 3/4 inch mark from the base. You can also trim your cups so that they are not so tall. Pour the resin up to the 3/8 inch mark, then the hardener up to the 3/4 inch mark. It is really important that you putting equals part of each. If not, the final resin will not harden properly and be sticky.

Mix the two liquids together with a wooden stick for 2 minutes, scrapping down the sides as you would when mixing your favorite cake batter. Do not freak out if you see tiny bubbles as they will disappear. Next, pour the mixture into your second cup and continue mixing for another minute. I am not really sure why the Etsy blog called for transferring into the second cup but I did it anyways. Once the 60 seconds are up, let the resin rest for 5 minutes.

As you can see my case is curved around the edges. I wanted to make sure the resin would spread evenly around the curves so I cut an old toothpaste box to size and placed the case on top of it for the excess resin to drip down from. If your case has straight edges, you do not need to elevate your case because you can just pour the resin over the top. Make sure to tape the box to the case's underside and your papered surface (I used an old shopping bag) so that nothing moves.

Slowly pour the resin over the case, then spread evenly all over the case with your wooden stick. You can gently tap any bubbles to make them pop and disappear. I am super glad I elevated the case because as you can see there was a good amount that dripped down. I would periodically scrape any drippings with a wooden stick as the resin dried.

The completed PHONE case
Let your case dry overnight and voilà your prettified case is ready. Earlier I mentioned that I used fabric glue I had around the apartment instead of craft glue. The former caused the green leaves to discolor. Oddly, the yellow flowers remain vibrant yellow. So do not be like me and use any kind of glue and make sure to use the proper kind that will not alter your flowers' pretty colors.
Anyways, I really hope my mom likes this case. She is one hard cookie to impress, so fingers crossed!


