
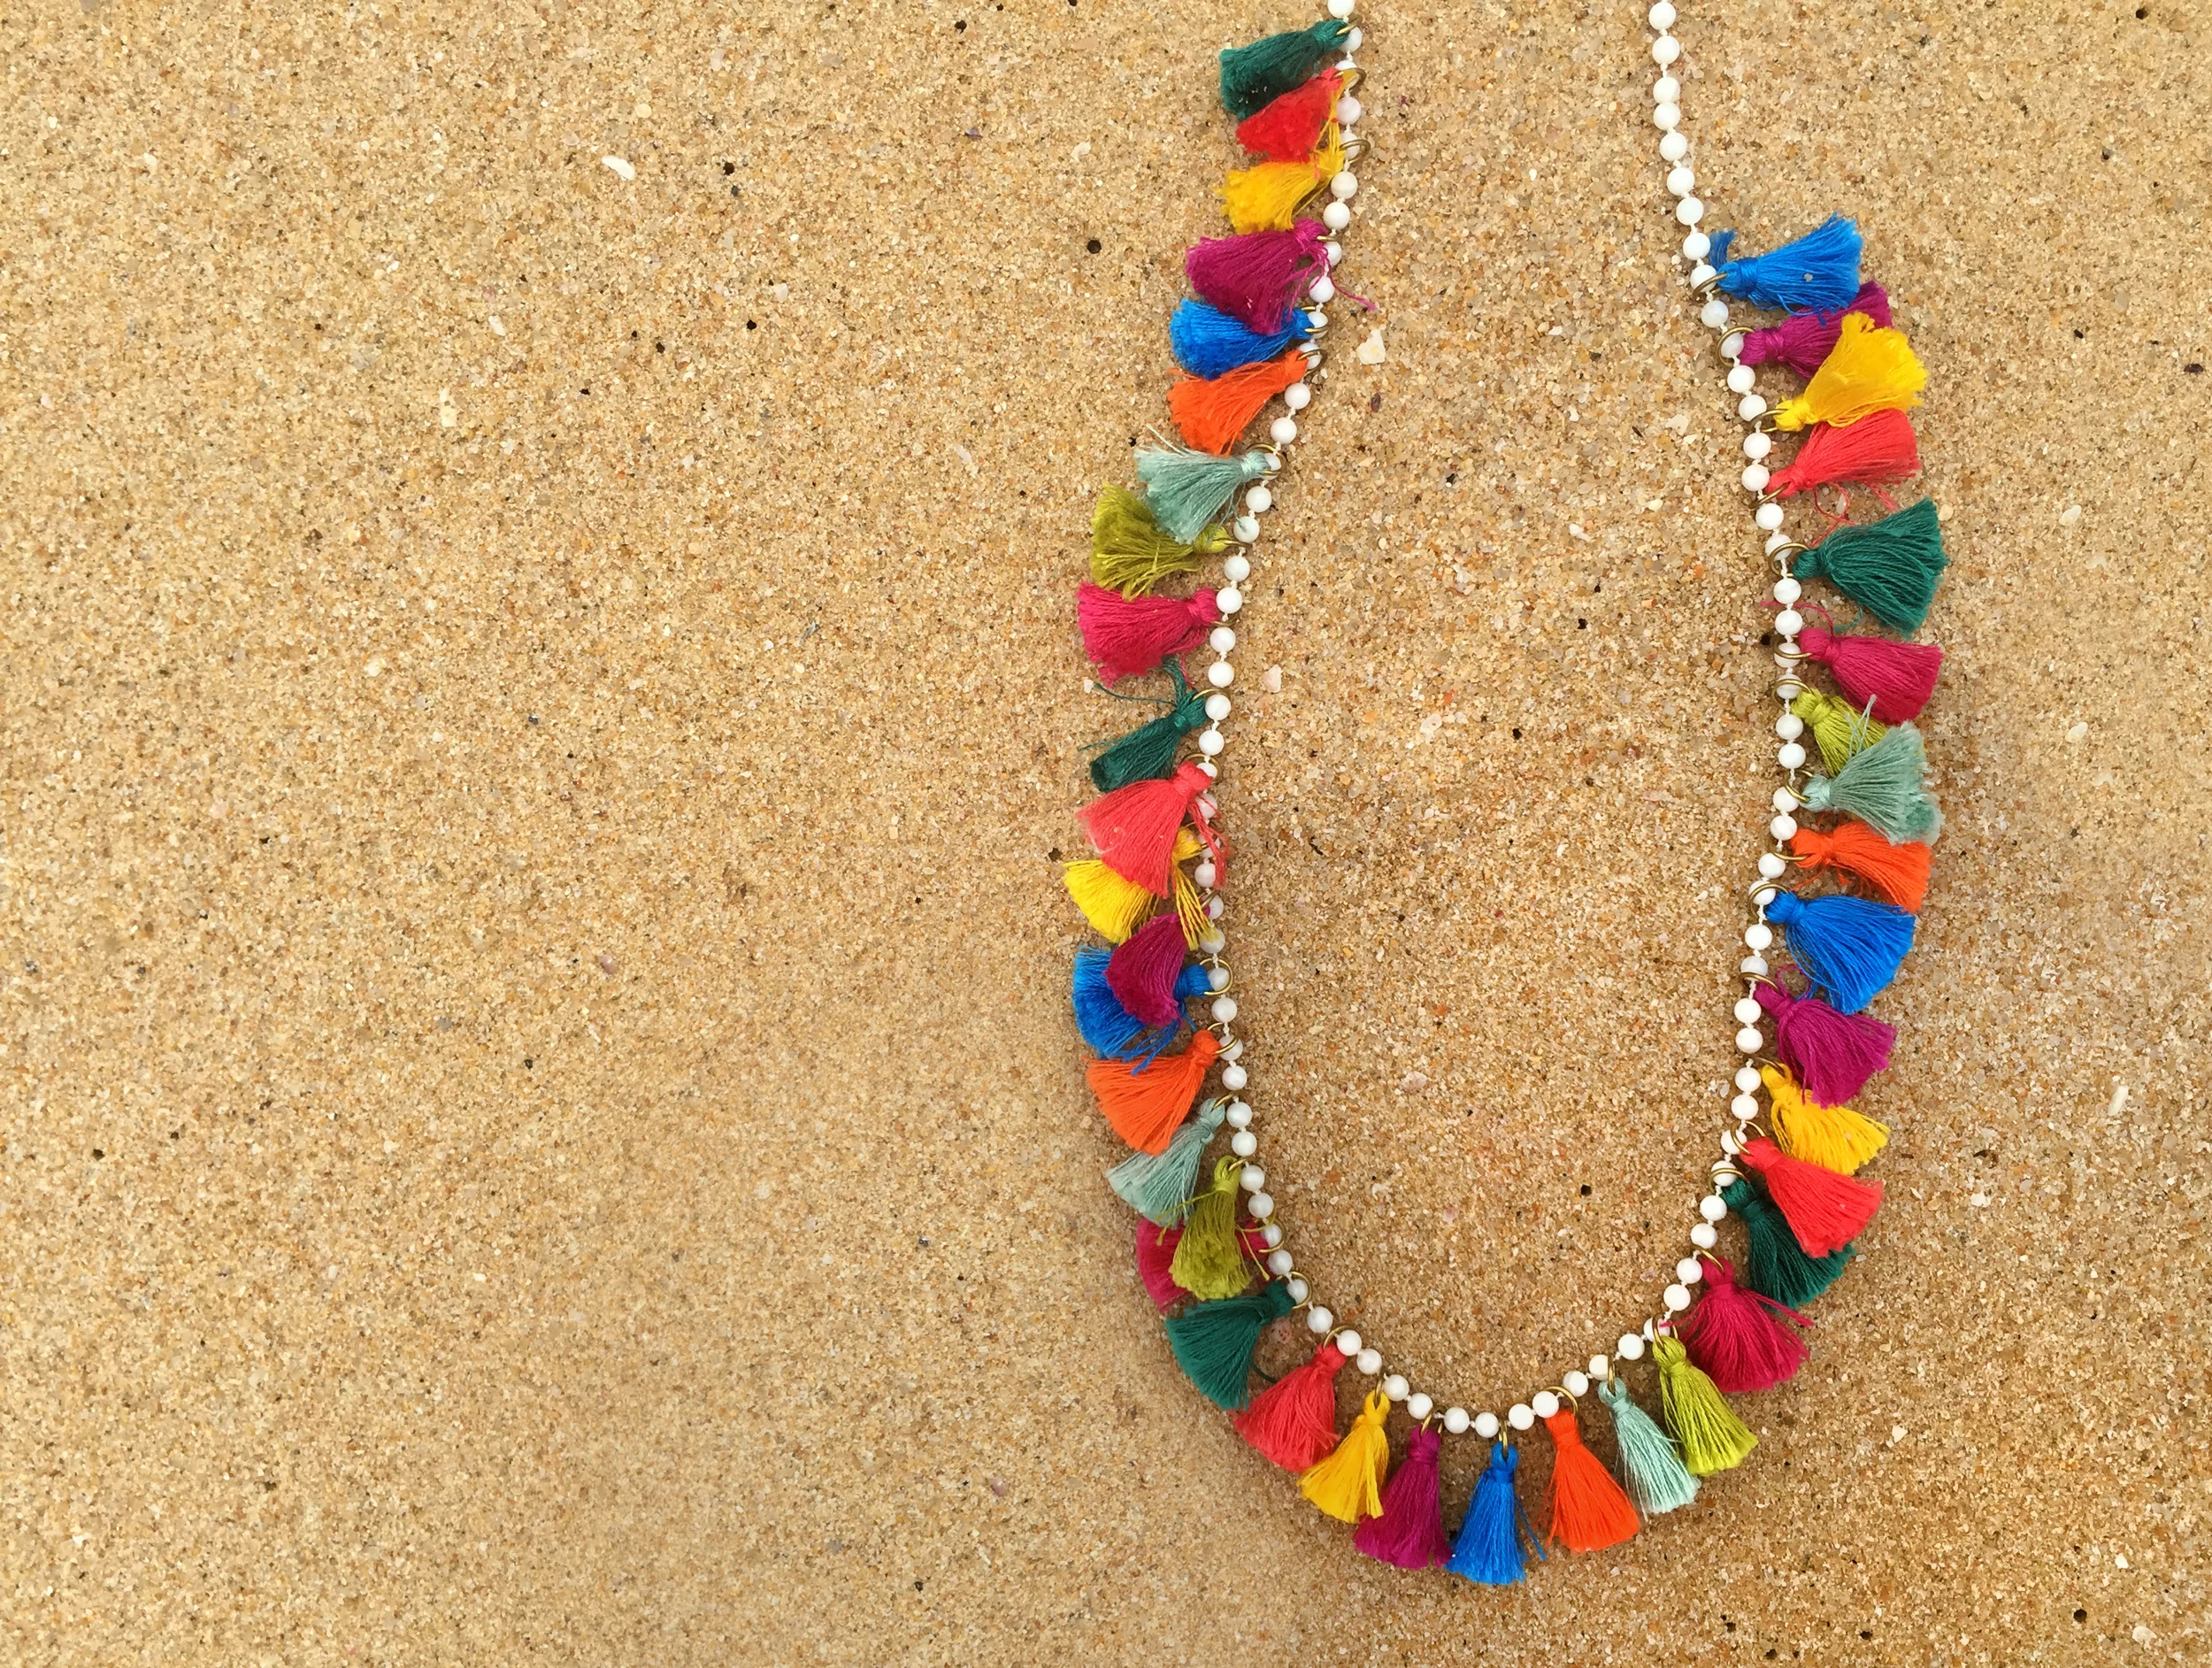
DIY Tassel Necklace
Last year, I attended a tassel-making class at Etsy's Brooklyn headquarters and always wanted to apply what I learned during that class to some sort of DIY project. I have been seeing tassel-adorn necklaces pop up at my favorite shops including J.Crew. This bright and festive one will liven up any of your outfits this summer season.
THINGS YOU WILL NEED:
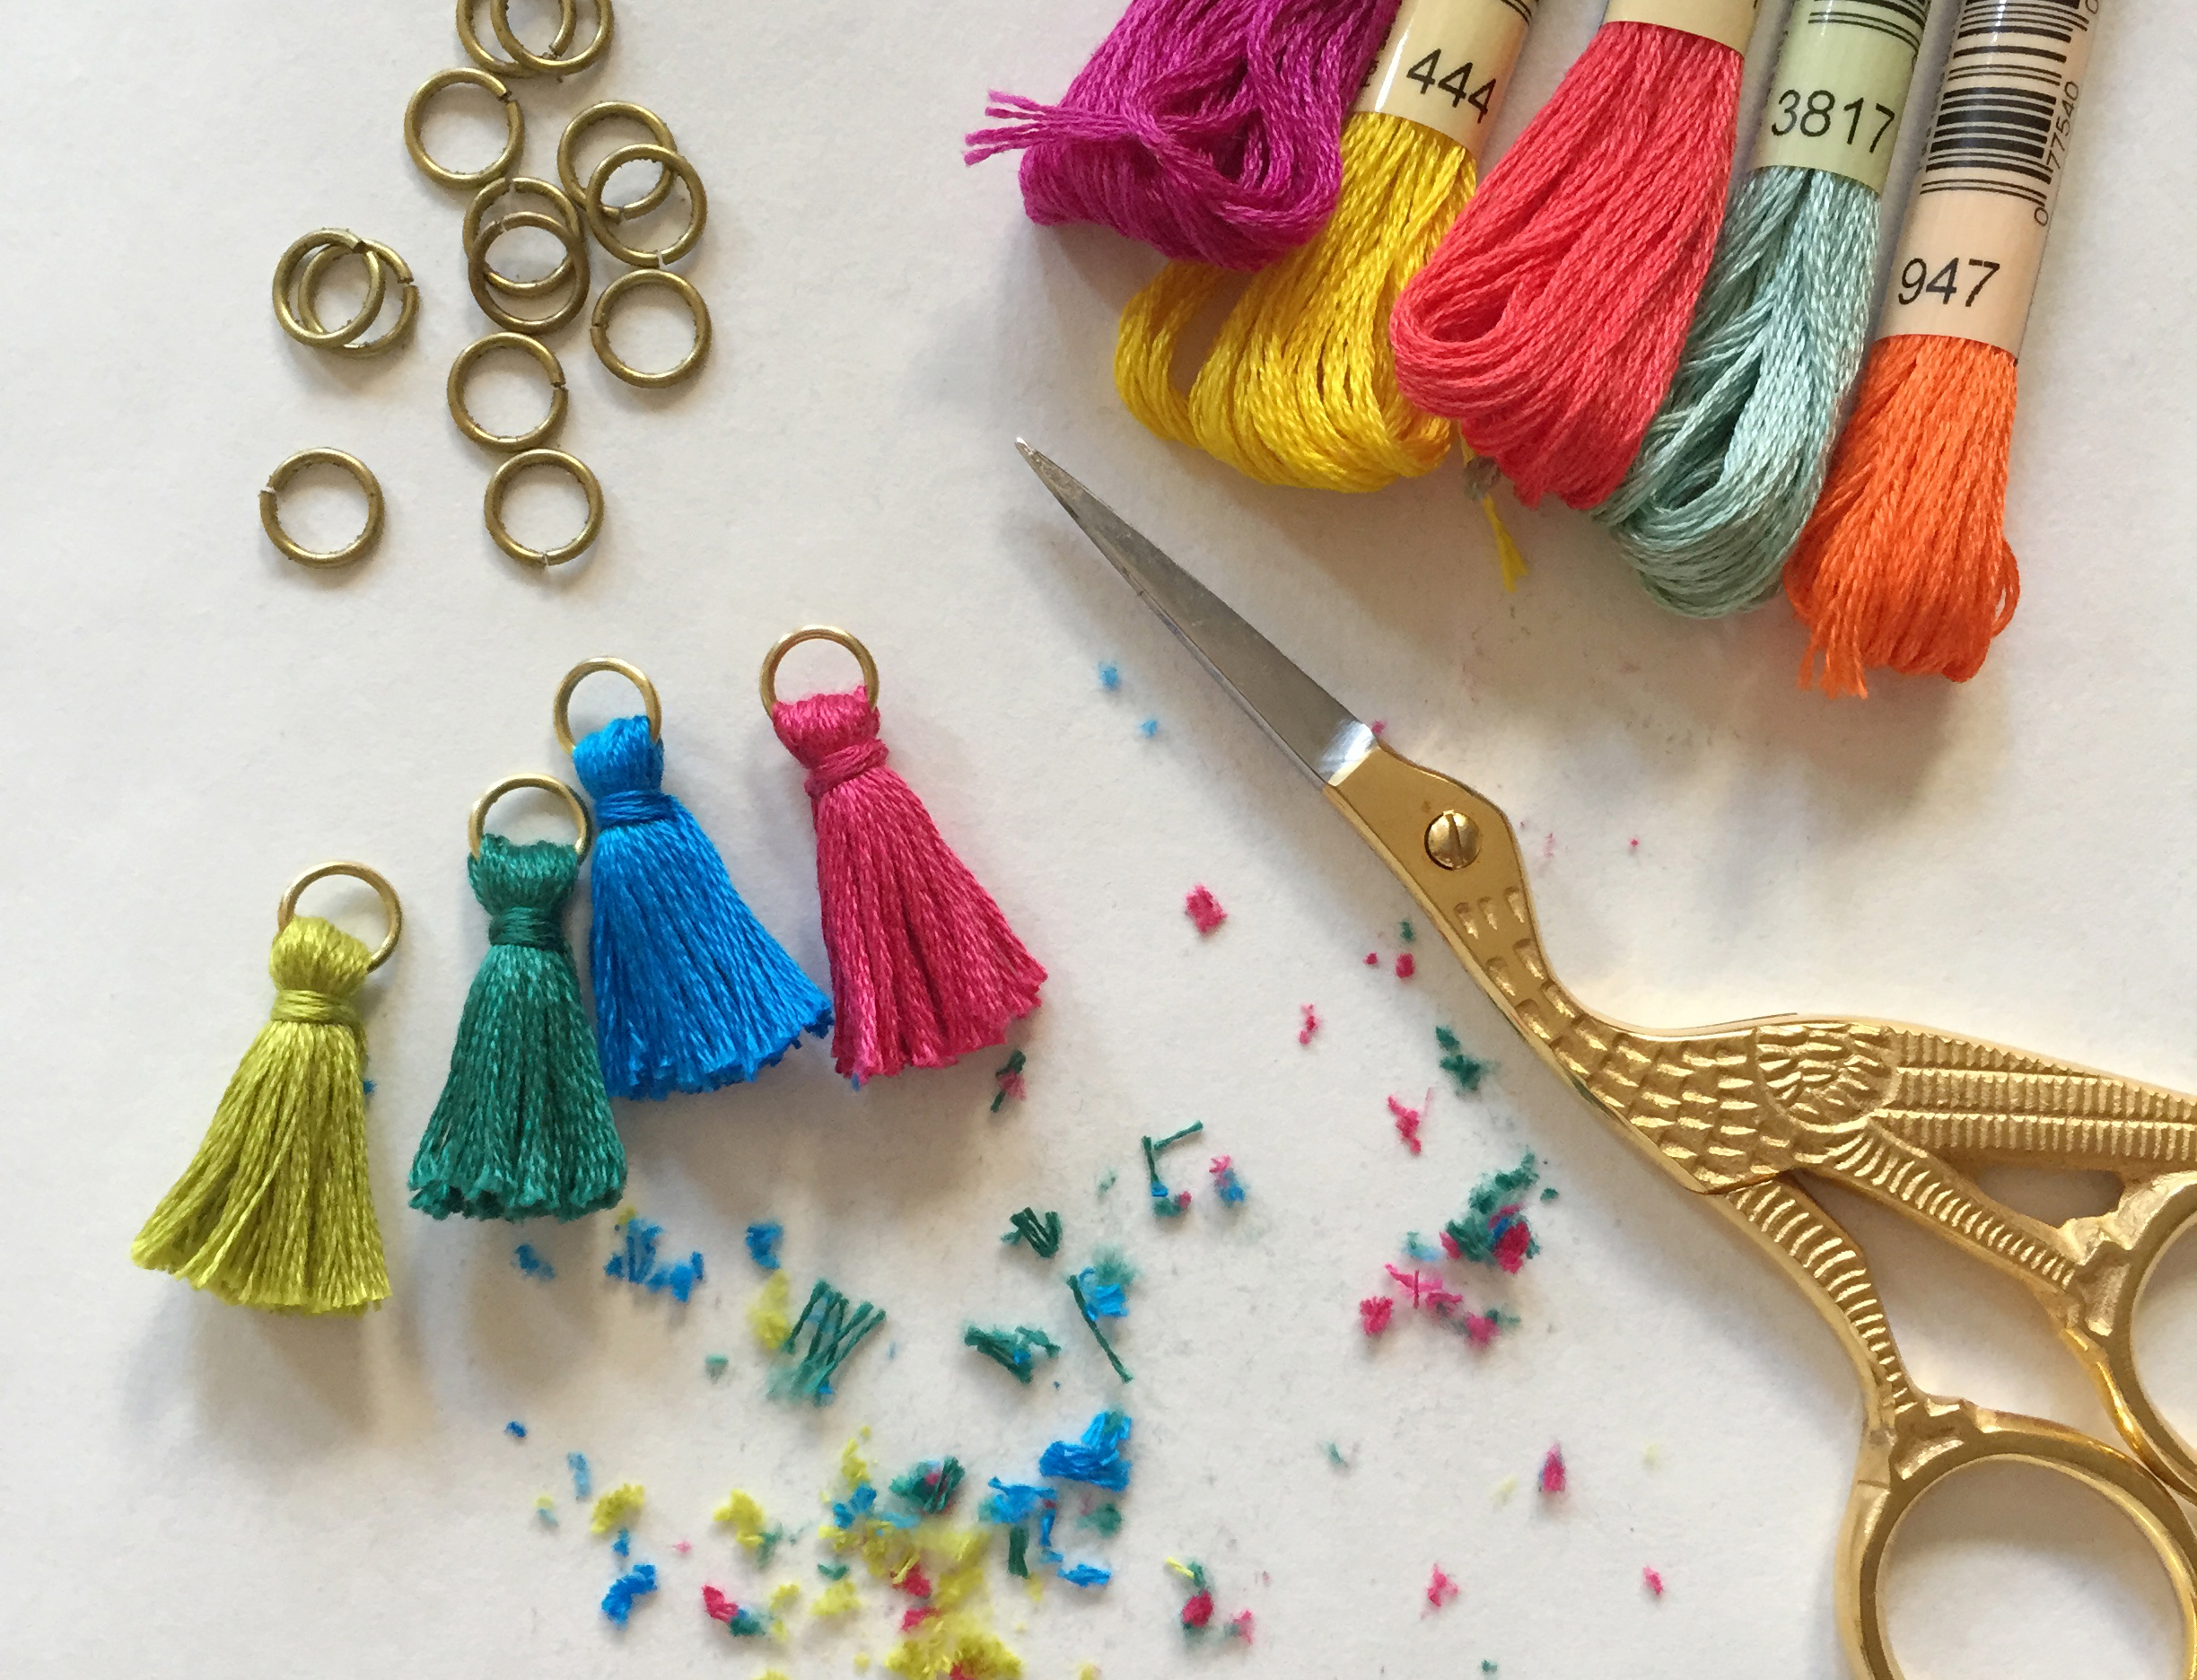
embroidery floss thread in as many different colors as you would like (this necklace features 9 colors)
ivory-colored beads
approximately 40 1/8 inch jump rings
100% silk bead cord No. 4
3/4 inch x 2 inch piece of thick cardstock (you can use an old cereal box)
2 sets of jewelry pliers (If you do not have, eyebrow tweezers will do. "Make it work!" as Tim Gunn would say)
scissors
needle


To begin, open a jump ring by gripping it on either side of the split with your pliers, then grip the other side with your second pliers. Twist one hand towards you while the other hand moves away from you. Next, wrap the thread around your piece of cardboard a couple of times. Afterwards, loop your opened jump ring through the thread and continue wrapping around the cardboard and jump ring about 13 more times.


Close your jump ring using the same back-and-forth twist technique with your pliers. Remove your looped thread from the cardboard then rotate the jump ring so that the the split is not exposed. Wrap another piece of thread about 3-4 times near the neck of the tassel and tie it securely. Put your scissors through the loop and slowly cut the threads.


Trim it so that the tassel bottoms are even, snipping small amounts at a time. You will need about 40 tassels for this 33" necklace.
Tassel Party!

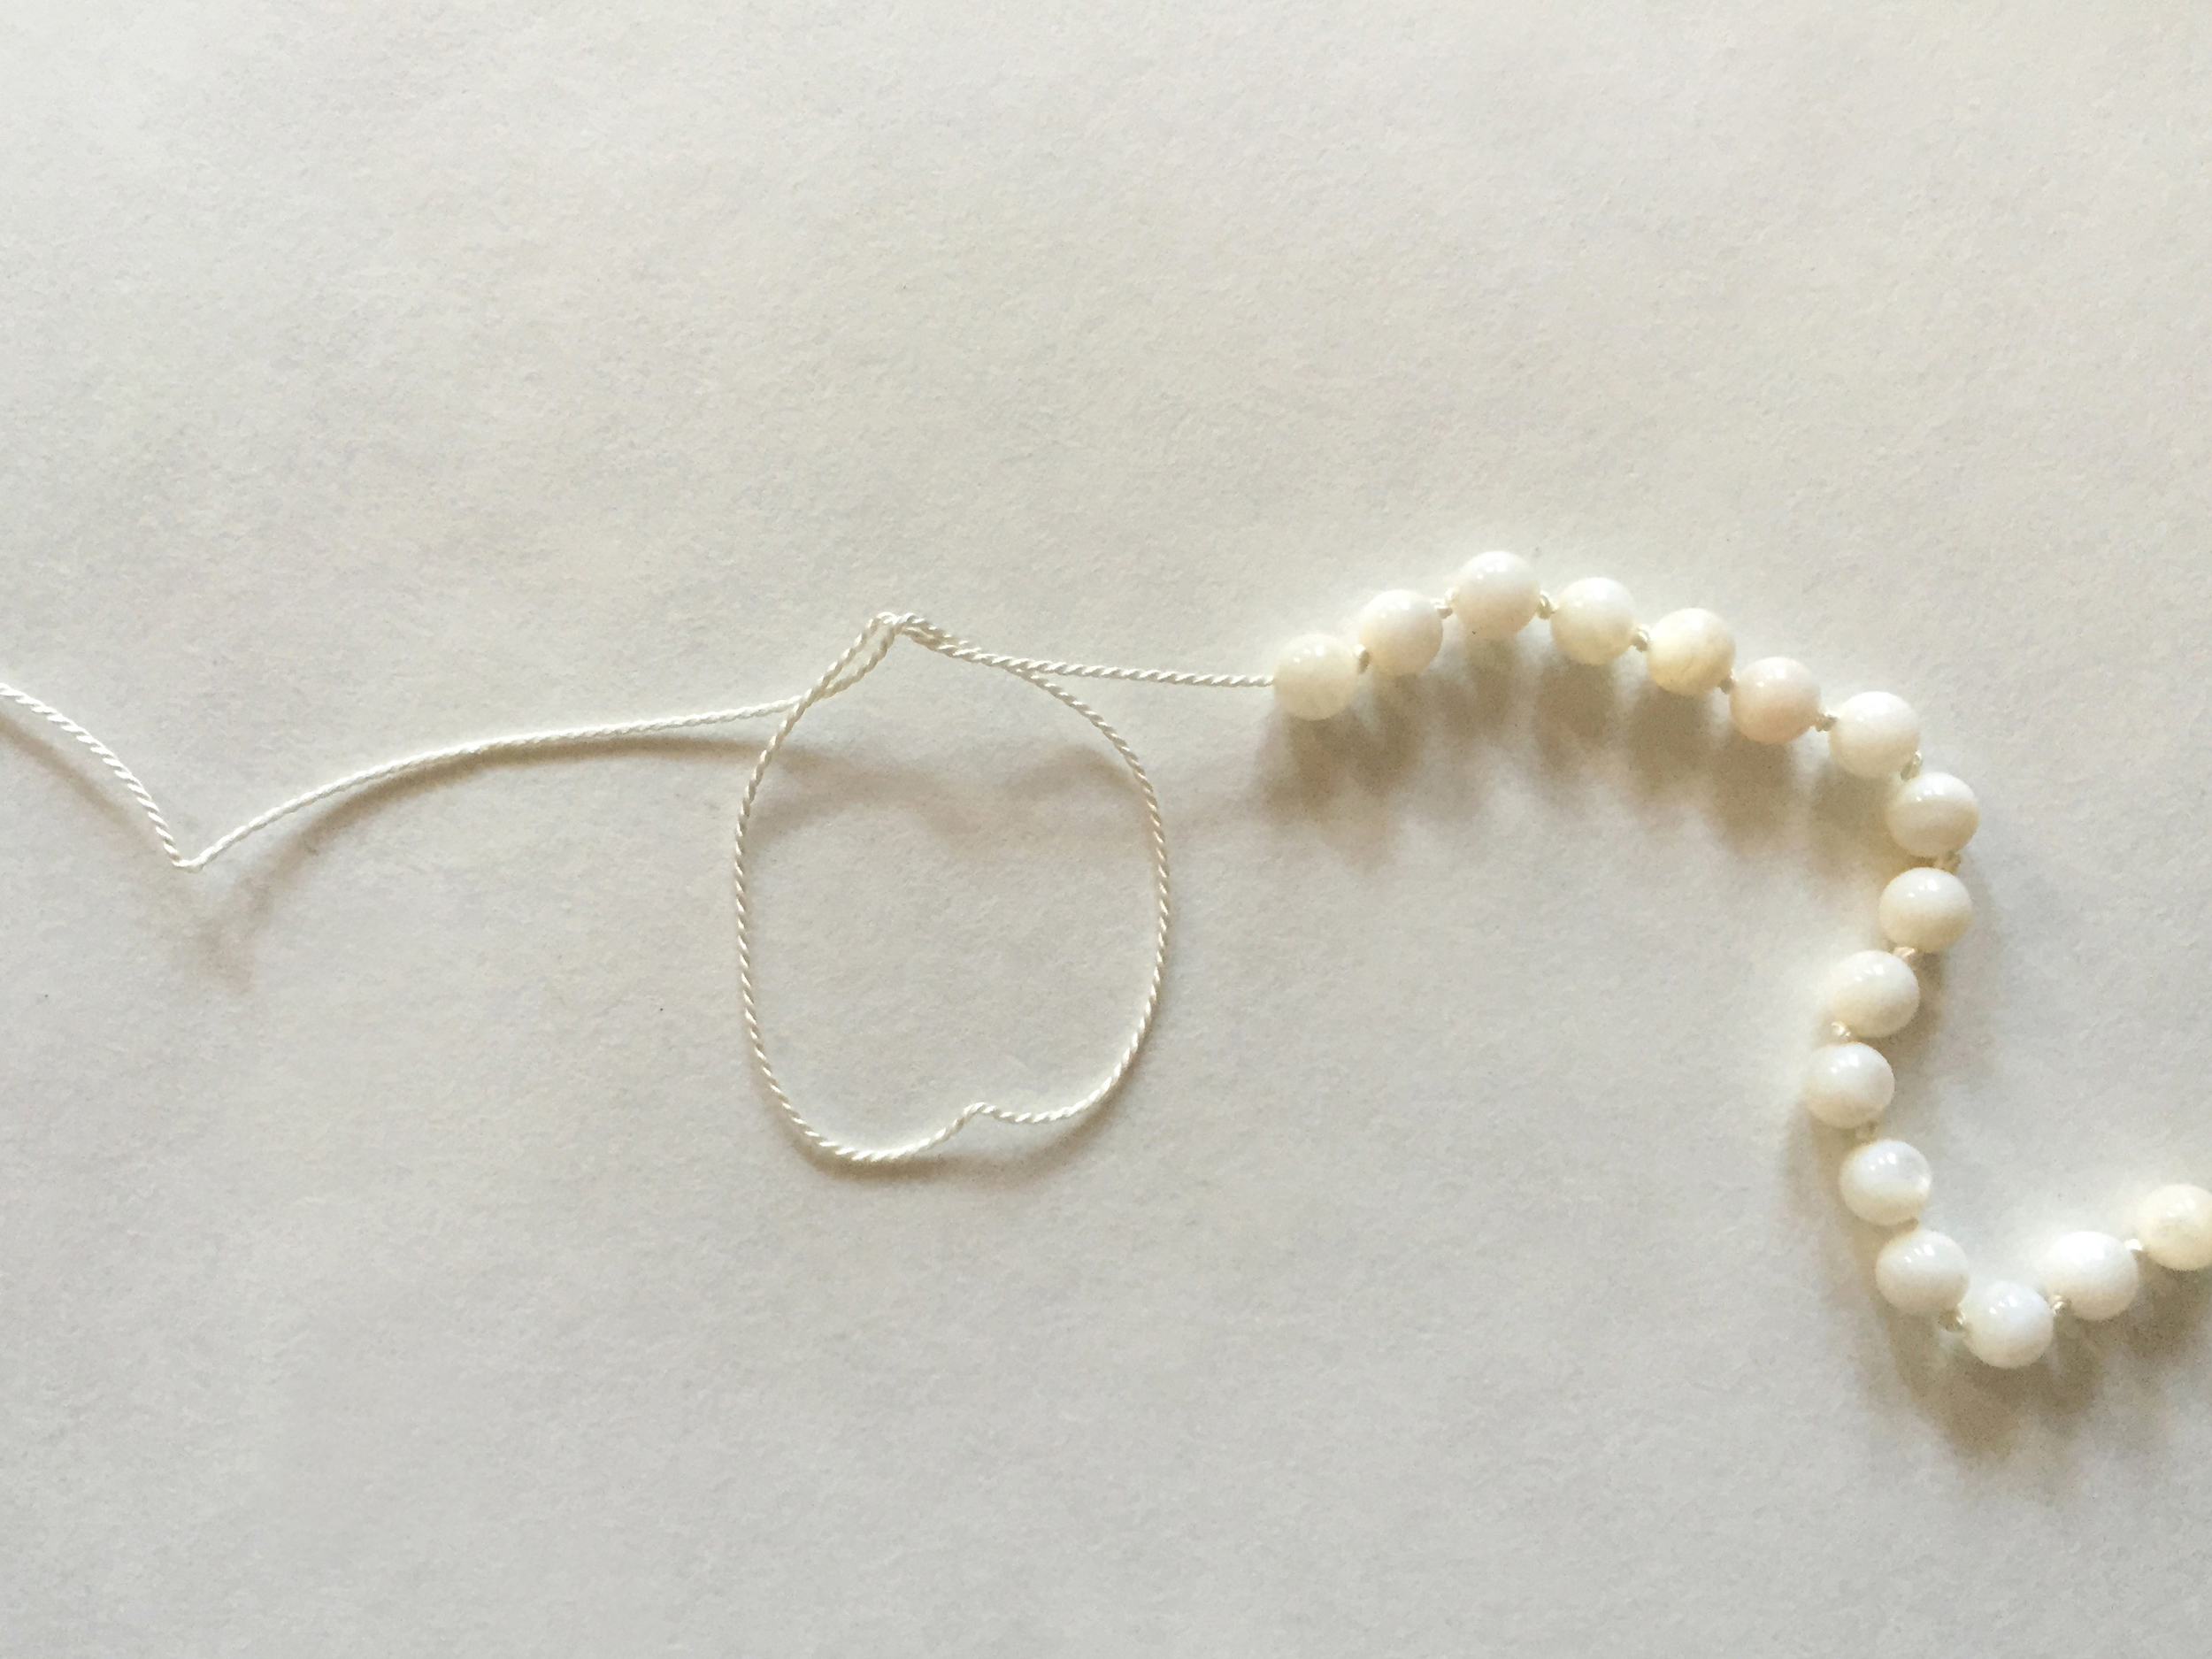
Next, stringing the beads! You will need to decide if you want a knot in between each bead (bottom row in below's picture) or not. I opted for the former option as the necklace is a lot more secure and I like the spaced-out look.

So how to knot. First, make a double knot with your silk cord, leaving about 2-3 inches so that you can tie your necklace together at the very end. String your first bead, then make a loop with your cord. Place a needle inside the loop then push the needle towards your bead so that your knot gets smaller and closer to your bead. String your next bead and push that bead against the knot to make sure the knot is as tight as possible. Next, slowly pull out the needle. Repeat until you have your desired length. String about 6 inches of beads before you start adding the tassels.


Next, repeat the same technique but just add a tassel after each knot, having two beads in between each tassel. After you have strung all of your 40 tassels, you will need to string only the beads again until you have a length of 6 inches. Triple knot both ends together to complete this project.

The FINISHED Necklace


I love how this necklace turned out and it definitely brightened up this simple white romper. You too should definitely try making one this summer!

